Server Status with Keyboard LEDs
This page describes how you can use keyboard LEDs to monitor
the status of a linux server.
Background Info
I have a number of linux servers at home, and typically want to be able to monitor
the status of them remotely.
The servers are all located in a walk-in-cupboard in my office, and being able
to see the status of some key parameters is very handy.
In particular, I want to be able to see the status of my internet firewall,
a Smoothwall
box, ie, if my internet connection is up,
and if traffic is being received and/or transmitted.
Keyboard LEDs?
All my servers run various flavours of linux,
and typically run headless (ie, no monitor/keyboard/mouse), but are accessed remotely
via SSH and/or HTTP.
While it would be possible to connect a small LCD to a server, and write some software
to display status information on the LCD, this required a lot more effort and
expense than I was prepared to expend.
Instead, I use some software running on each linux box, to toggle the keyboard LEDs
on and off to indicate status information.
Instead of having a full-size keyboard plugged into each server, I disassemble
the keyboard, and remove all the unnecessary components, leaving just
the circuitry required for controlling the LEDs.
The standard LEDs are replaced with new LEDs that are easier to mount, and an
additional power LED is added, allowing the three LEDs (NumLock, CapsLock, ScrollLock)
to be used to indicate various status information.
The relatively long PS/2 cable on most keyboards is ideal for remotely mounting the LED display
remotely from the linux box.
Disassembly
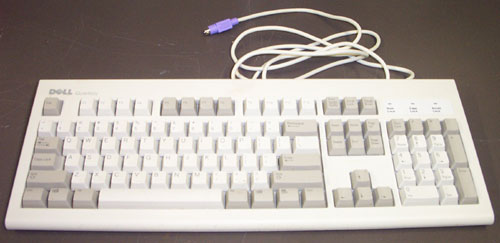
Firstly, an appropriate donor keyboard needs to be identified.
Note that keyboards which have exceeded their useful lifespan are ideal for this. Even though
some of the keys may no longer work, providing all three LEDs work, the keyboard is
still suitable for using as the basis for a remote keyboard LED monitor.
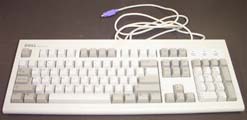
the donor keyboard
| |
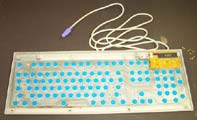
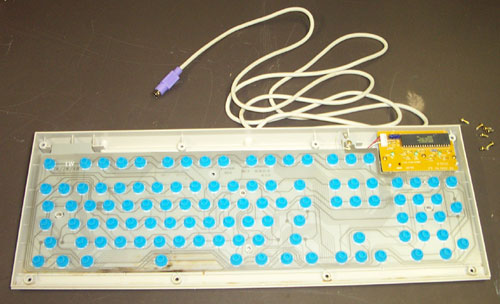
in pieces
|
The keyboard featured here was suffering from increasingly frequent instances of multiple
keys not working. Once it was disassembled, it was obvious that this was caused
by some fluid which had been spilt into the keyboard, as shown by the dark areas
near the space bar area of the disassembled keyboard.
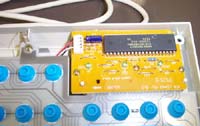
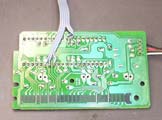
the keyboard PCB
| |
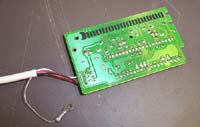
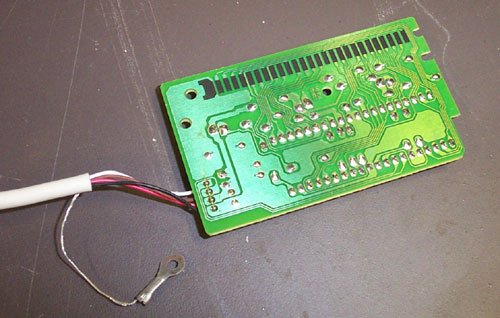
the underside of the PCB
|
Once the keyboard is in pieces, the PCB will be exposed. The PCB and PS/2 cable
are the only parts of the keyboard which need to be retained. The rest
can be discarded.
New LEDs
The standard LEDs on the PCB do not lend themselves to mounting very well,
due to the layout of the PCB.
I used a length of ribbon cable recycled from a floppy drive cable to connect
the new LEDs to the PCB, thus providing much more flexibility for mounting the LEDs.
After unsoldering these LEDs and removing them from the
PCB, follow the traces from the LEDs on the PCB to identify an appropriate place
to solder the ribbon cable.
You'll also need to identify the +5v signal and ground on the PCB, as they are
required for the power LED.
The easiest way to do this is using a multimeter to determine which wire on the PCB end
of the PS2 cable is connected to the pins in the PS2 plug, as shown below.

PS2 plug pinout
The keyboard featured in these photos had the cathodes of each LED tied together, and connected
to the +5v rail, with the anodes being toggled by the keyboard circuitry.
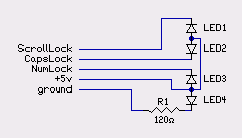
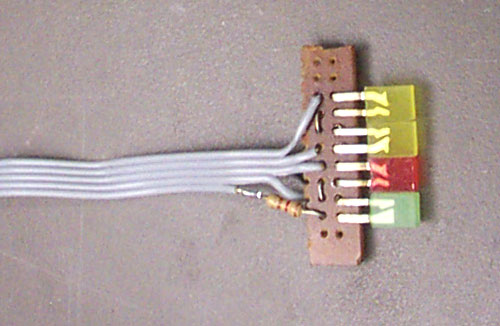
wiring of the LEDs on the vero board
A short length of vero board is used to mount the LEDs, with a 120 ohm resistor (brown-red-brown)
connected between the anode of the power LED and the ground on the PCB.
LED1-3 are the replacement LEDs for the ScrollLock, CapsLock and NumLock LEDs, respectively.
LED4 is an additional LED which shows the power status of the PC.
That is, LED4 will be on if the PC is turned on, and will be off if the PC is powered off,
as it's wired to the +5v terminal of the PS/2 port.
connections under the PCB
| |
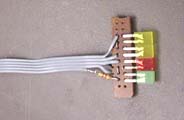
vero board with LEDs
|
I chose to use some flat rectangular LEDs, as they can be mounted relatively easily
(and I had some left over from another project).
You can substitute any LEDs, depending on what you have or how you want to mount them.
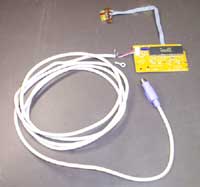
completed keyboard LEDs
After testing your completed circuitry, it's just a matter of mounting the LEDs in an
appropriate enclosure, and configure appropriate software to control the LEDs.
Software
There are a number of linux applications available for driving the keyboard LEDs.
A number of these are listed below, but please let me know
if there are others.
ifled
A small application which uses the keyboard LEDs to indicate various status information
about network traffic on any network interface.
sifled
Based on ifled,
this application provides some extensions specifically for indicating additional
information on a Smoothwall firewall, namely the status of the internet connection
(ie, the status of Smoothwall's red interface).
tleds
A small linux application which uses the NumLock LED to indicate incoming traffic
and the ScrollLock LED to indicate outbound traffic on a specified network interface.
ixbiff
A small linux application which can flash the keyboard LEDs in a user-defined way
when new mail is received. It supports the standard unix mbox format, as well
as the qmail Maildir format.
I use four LEDs (3 keyboard LEDs plus the additional power LED) to show the following
information for my Smoothwall server,
using sifled to drive the LEDs:
- green LED: power on
- red LED: internet connection (ie, red interface) is up
- orange LED: internet interface is transmitting
- orange LED: internet interface is receiving
References
last updated 24 Mar 2026
|