|
KYB shocks and struts installation on TJ Magna wagon
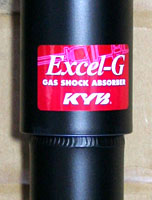
This page describes my experiences with the installation of KYB Excel-G rear shock absorbers and
front struts on my Mitsubishi TJ Magna wagon.
Background
Suspension setup is typically a compromise between comfort, and roadholding/handling.
I find the stock suspension on most mainstream cars is typically too soft, as the engineers
designing the suspension typically go for comfort, at the expense of handling.
In an effort to improve the handling of my TJ Magna wagon, it already has low King springs,
and a Whiteline rear sway bar.
This combination has already provided a significant improvement in the handling of the car.
When I found that one of my front struts was leaking, I investigated the alternatives.
Apparently the Monroe GT struts provide a very harsh ride, and
the general recommendation on AussieMagna forums
was for KYB struts.
Phillcom Rally had KYB struts and shocks on special at
the time. Because the wagon rear shocks are relatively cheap (compared to the front struts),
I decided to replace the rear shocks at the same time.
I ordered a set of KYB Excel-G front struts, and a set of KYB Excel-G rear shocks from Phillcom Rally,
at a cost of AUD$250 for the front struts, AUD$110 for the rear shocks, with delivery being
an extra AUD$20.
Note that the rear shocks for a Magna sedan are different, and will cost more than
the rear shocks for the wagon, due to a different rear suspension.
Tools Required
I used the following tools:
- spanner set
- socket set
- spring compressors (for disassembling front struts)
- large screwdriver (for removing brake hose clip on front struts)
- jack
- axle stands (for supporting the car while replacing the front struts)
- car ramps (for supporting the car while replacing the rear shocks)
Installing the new struts on the front of my Magna took about 1.5 hours,
while installation of the rear shocks only took about half an hour.
Caution
Never work underneath a car that is only supported by a jack.
Always securely support the car using car ramps and/or axle stands.
Disassembling a strut assembly is a potentially dangerous activity,
due to the kinetic energy in the compressed spring.
Only use high quality spring compressors, and read and follow the
instructions provided with the spring compressors carefully.
Installing KYB Struts on the Front
Jack up the front of the car
Before jacking up the car, I recommend loosening the damper shaft nut approximately half a turn.
This is the large nut in the centre of the strut top, hidden underneath a dust cover.
It can often be easier to loosen it slightly with the car's weight on the strut, as this will prevent any
parts of the strut from rotating.
Jack up the front of the car, and support it with axle stands under the chassis.
Note that both sides of the front of the car should be at the same height, with both front
wheels off the ground, else you will be working against the front sway bar when attempting to
remove the struts.
The KYB installation instructions recommend removing and replacing the strut on one side
before removing the second strut.
Removing the old strut
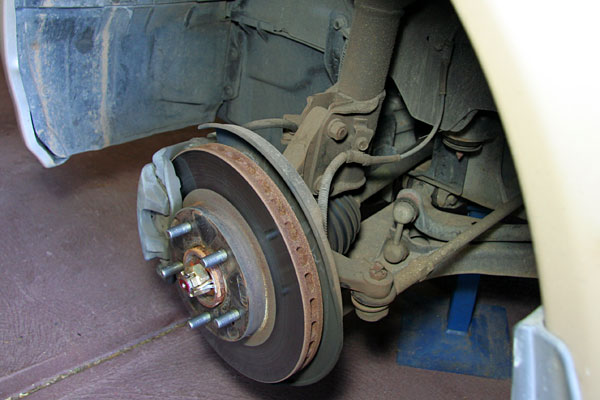
Remove the front wheel, and unbolt the ABS sensor wire on the rear of the strut.
Using a large screwdriver, remove the clip that retains the brake hose in the strut.
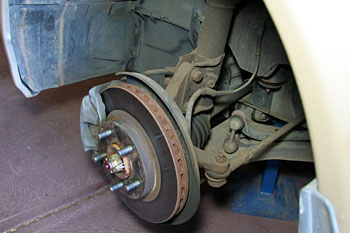
the old strut
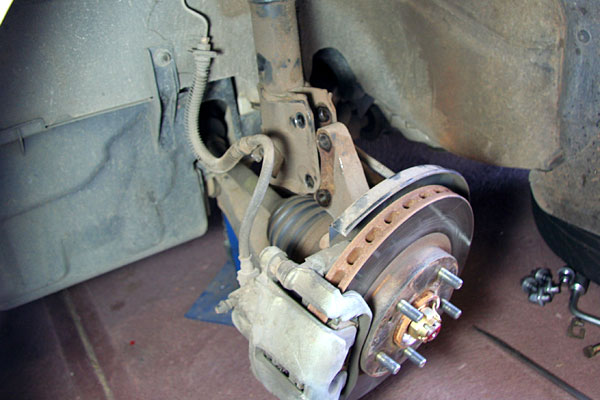
Remove the two strut-to-steering knuckle nuts.
The Haynes manual suggests removing these two bolts with a hammer and punch, but this could damage
the thread on the bolts.
By supporting the weight of the steering knuckle, these bolts can easily be removed by hand.
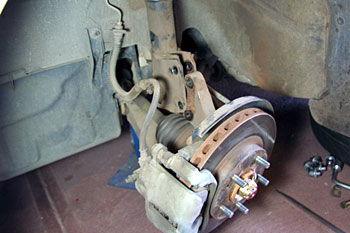
after removal of the brake line, ABS wiring and strut-to-steering knuckle bolts
Separate the strut from the steering knuckle.
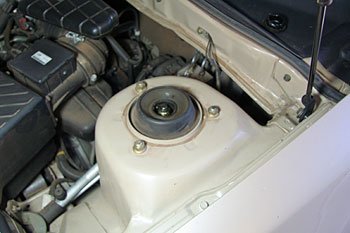
strut upper mounting nuts and damper shaft nut
Remove the three strut upper mounting nuts, while supporting the weight of the strut assembly from underneath,
and then remove the strut assembly from the car.
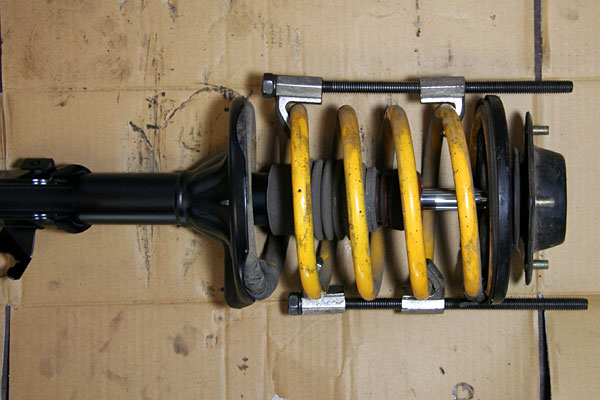
Disassemble the strut
Use spring compressors on the spring to relieve pressure on the strut top.
Once you have confirmed that the spring is no longer exerting any pressure on the strut top
(ie, the spring should be loose), remove the damper shaft nut.
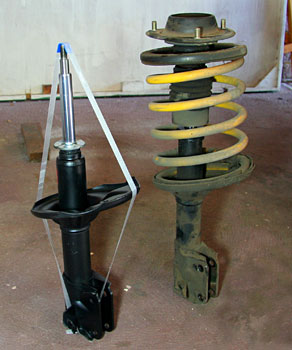
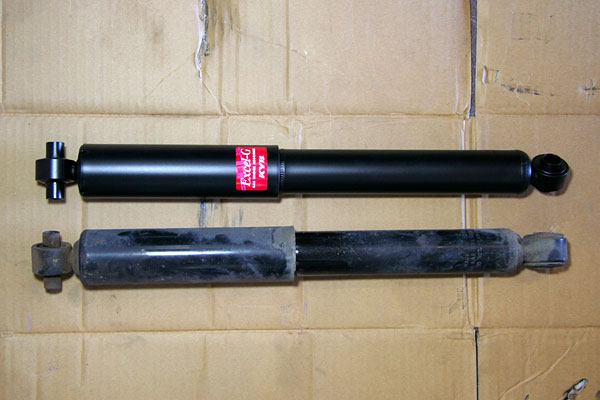
the old and the new struts
The strut insulator can then be removed from the top of the shaft, as well as the upper
spring seat.
Be sure to note the orientation of the upper spring seat, to ensure it can be replaced
The spring can then be removed from the strut, and then remove the rubber bump stop
and dust cover from the strut shaft.
Reassemble the new strut
Reassembly is a reversal of the disassembly process.
Insert the rubber bump stop and dust cover onto the shaft of the new strut.
The rubber insulator on the lower spring seat must also be transferred onto the new strut.
The spring (still restrained with spring compressors) can then be installed onto the strut.
It's very important to ensure the spring is correctly located on the lower spring seat,
with the end of the spring located in the lowest point.
The upper spring seat can be installed, ensuring correct alignment, followed by the strut insulator,
and then the damper shaft nut can be installed and tightened.
Note that KYB provide a replacement damper shaft nut with each strut, and this should be used
instead of the original nut.
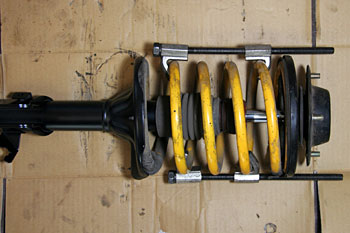
reassembling the new strut
Once the damper shaft nut has been tightened, the spring compressors can be loosened,
taking care to ensure the spring stays in the correct location in the lower and upper spring seats.
Install the new strut
Lift the strut into position under the car, and replace and tighten the
three strut-to-spring tower nuts.
Slide the steering knuckle into the strut flange, insert and tighten the two bolts.
Locate the brake hose in the bracket, and install the retaining clip.
Bolt the ABS sensor wiring to the strut, and finish by re-installing the wheel.
Repeat for the other side
Repeat the same process, and replace the strut on the other side of the car.
Front wheel alignment
After removing and replacing the front struts, it's important to get a
front wheel alignment done.
Removing and replacing the struts is likely to affect the toe-in and
camber of the front wheels, and this will affect tyre wear if it is not
corrected.
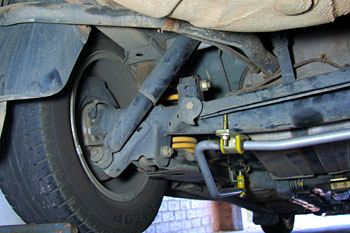
Installing KYB Shocks on the Rear
Wagon-specific
Note that this information describing the replacement of rear shocks
is specific to the Magna wagon, as the Magna sedan has a totally different
suspension geometry.
Car on car ramps
The Haynes manual for the Magna says you should jack up the rear of the wagon,
put axle stands under the rear axle, and remove the rear wheels.
However, I found this was not necessary.
Putting the rear of the wagon up on car ramps provides sufficient access
to be able to replace the shocks without having to remove the rear wheels.
Remove old shock
Undo the mounting nut at the bottom of the shock absorber, and remove the
bolt at the top of the shock absorber.
chassis.
the old shock
The shock absorber can then be removed, although some gentle persuasion
may be required, as the top of the shock absorber is a tight fit in the body mount.

the old and the new shocks
Install new shock
Installation of the new shock absorber is the reverse of removal.

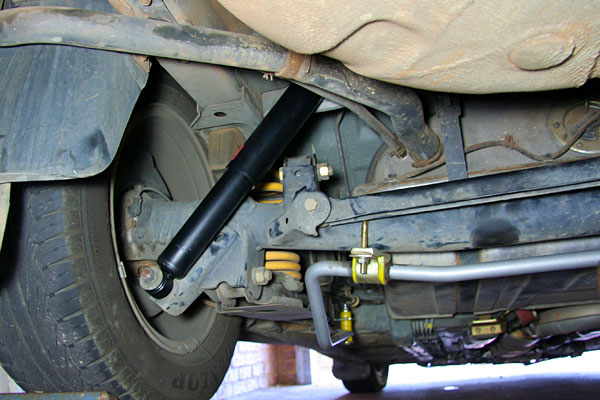
new shock installed
Note that aligning the top of the new shock absorber with the holes in the chassis
can be a little time-consuming, as it is a tight fit in the chassis.
Once the new shock has been installed, replace and tighten the mounting nuts and bolts.
Repeat on the other side of the car.
Initial Impressions
The new struts and shocks haven't made a huge difference in the handling of the car,
but it does feel more settled over bumps, particularly when encountering
bumps mid-corner.
A custom polyurethane engine mount installed several months ago
virtually eliminated all wheel hop.
These KYB shocks and struts have further reduced the little wheel hop that still remained.
Conclusion
The KYB struts and shocks were a worthwhile upgrade.
I had to replace the front struts, due to a leak in one of the original struts,
and the KYB replacements have provided a small improvement in the handling of the car.
References
last updated 24 Mar 2026
|