posted Sunday, 27 April 2008, 22:35 (+0800), by Martin

Overview
Producing bookmarks with your photos provides another mechanism for you to share your photos, and can also provide a way to publicise your website. Bookmarks can also make attractive gifts, and can easily be slipped inside an envelope along with a card.
If you run a photography business, you can also use these bookmarks to advertise your business.
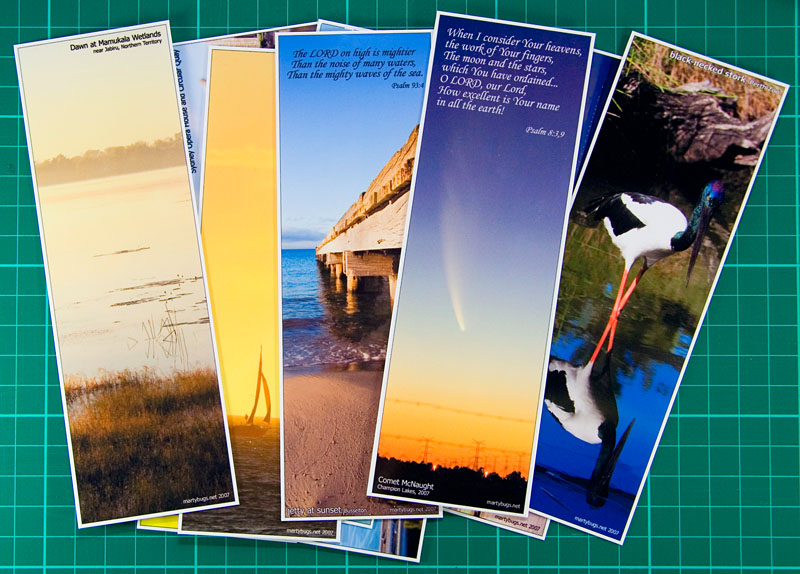
completed bookmarks
With photo-quality printers becoming cheaply and readily available, many people will be able to make these photo bookmarks at home. (However, many people may not have a laminator at home. Laminators are reasonably cheap, and many printing places provide laminating services. Alternatively, your workpace may have one, so ask if you can use it.)
Requirements
In order to make your own photo bookmarks, you'll need:
- photos
- photo-quality printer
- photo paper to suit printer
- laminator
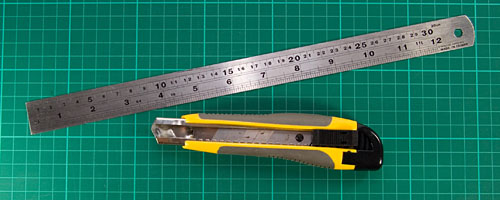
- craft knife
- steel ruler
- cutting board
I use Canon A4 Glossy Photo Paper in my Canon Pixma iP4300 printer, with great results. While laminating the bookmarks is not a requirement, it will ensure the ink doesn't run, and the robust laminate coating provides a much more robust and lasting bookmark.
Construction Overview
A quick outline of the process of making the bookmarks is as follows:
- create images in Photoshop or your favourite graphics editor
- collate multiple images in a word processing or desktop publishing application
- print out on photo paper
- laminate the printouts
- cut out each bookmark
- enjoy!
Construction Details
A more detailed description of the process used to create these bookmarks:
- Create images
Firstly, you'll need to select some appropriate photos. You can either use a single photo on a bookmark, or you can create a collage with multiple photos.
Due to the aspect ratio of a typical bookmark, not all photos are suitable.
I typically create the images in Photoshop, with a size of 600x1890 pixels, which equates to approximately 50x160 mm. Note that photos from modern digital cameras will be much larger than this, so you'll need to scale the photos down to suit these image dimensions. - Collate multiple images
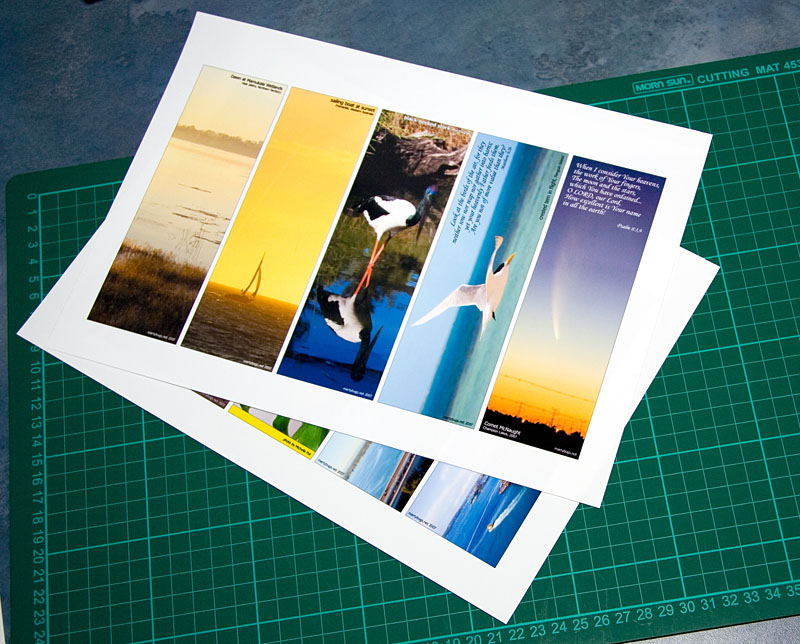
Now use your favourite word processing or desktop publishing application to layout multiple bookmarks onto a single A4 page (or legal size page, depending on which part of the world you live in). This allows you to maximise the use of A4 photo paper, reducing the waste. I typically fit five bookmark images onto a single A4 page.
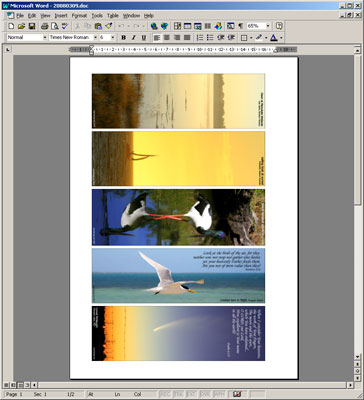 laying out multiple images in Microsoft Word
Spacing the images with a single blank line (6 point Times New Roman) provides just the right amount of white space as a white border around each bookmark, if, when cutting out the bookmarks, you cut in the centre of this blank line. - Print out images
Print your document onto photo paper. Printing on standard paper will significantly reduce the resulting quality of your bookmarks, and photo paper is available from most camera shops and supermarkets.
 printouts
Note that photo paper is typically one-sided, with only one side designed to be printed on, so double-check that you've loaded the paper into the printer the correct way! - Laminate print-outs
Allow sufficient time for the ink on the printouts to dry (refer to your printer documentation for more information), and then laminate the printouts.
 laminated pages
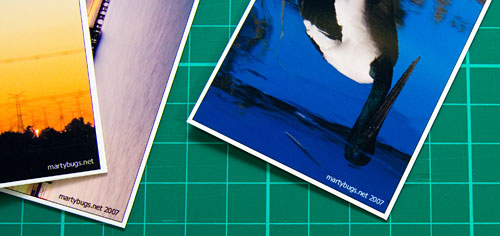
I find it much easier to laminate the entire A4 page, and then cutout the bookmarks afterwards. - Cut out bookmarks
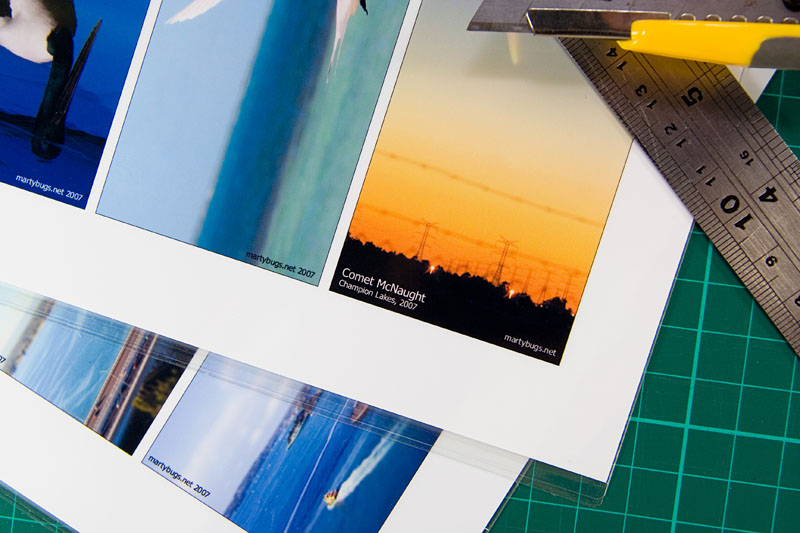
Using a cutting mat (or some scrap cardboard), sharp craft knife, and a steel ruler, carefully cutout each of the bookmarks.
 cutting board, ruler and knife
I generally leave a ~2mm white border around each bookmark, as I believe it provides a cleaner look, rather than allowing the photo to bleed off the edge of the bookmarks.
 completed bookmarks
Be careful not to cut yourself with the knife!

Tips
Some tips and suggestions for making your own bookmarks:
- space out multiple images before printing, to reduce the number of cuts required
- a thin (1 pixel) black border on the image can provide a more definitive border against the white paper, particularly on phots with a light background
- use high-contrast colours to make text easily visible against the photo background
- include a descriptive title for the photo (ie, location, etc)
- add a poem or scripture passage
- include your email address and/or website URL on the bookmark (be subtle, and use a small font)
Photos Used in Sample Bookmarks
To see each of my photos used above in the sample bookmarks in their entirety, click the corresponding thumbnail:


I have looked for so long for how to make books marks. I have done some in the past and laminated but the cutting wasn't successful. I am a photographer here in southern Spain, specialising in the images of old Andalucia.